To create a new review, click the New Review button on the Home screen:
You will see a Create Review Screen where you can specify information about the newly created review.
Tip: Alternatively, you may create a new review by copying any of existing reviews. This approach allows to retain some data (participant list, custom fields values, review materials) from the original review. See Copying Previous Review for details.
Creating a review involves the following steps:
Specifying general information about a review
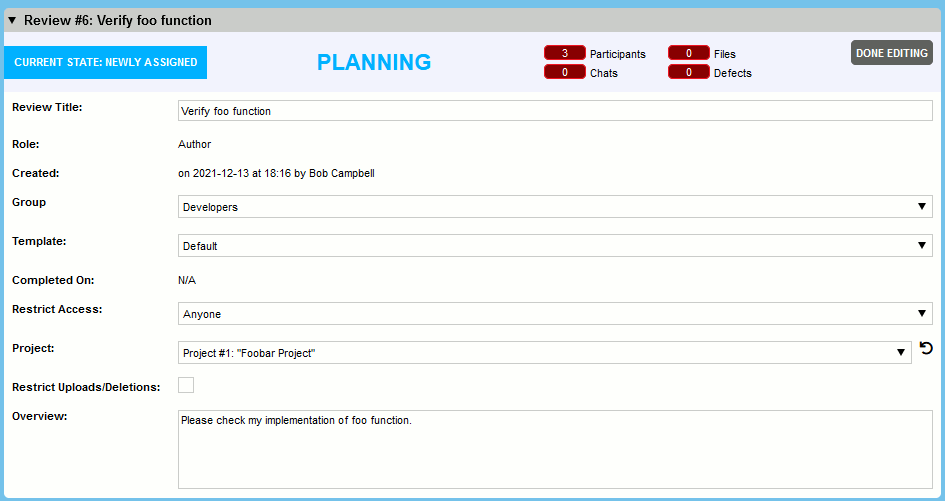
In the General Information section you can specify the following data about a new review:
| • | Review title - a brief description for the review. The title is used all over the place -- in Action Items, in notification emails, to web page titles, and so forth. Titles do not have to be unique in the system; reviews already have a unique ID that is assigned by the server. |
| • | Role - your role in the current review. This field is read-only. Your and other participant's roles will be set through the Participants section described below. |
| • | Created - a date when the review was created and a user who created it. This field is read-only and filled out automatically. |
| • | Group - a group of users associated with the review. This field only appears when the Groups feature is enabled and you belong to some user group. This field displays only the first 1000 groups and it excludes groups which have no members. Once you select a group, the participants list will be updated accordingly to show only those users belonging to the selected group. If you belong to only one user group, the group is set automatically. Changing the user group will cause you to lose any unsaved data applied to the review and may invalidate any saved data that is not applicable to the new group. |
| • | Template- a template for the review. The template defines all the rules and workflow that governs the review. This includes custom fields for reviews and defects as well as the set of roles and rules for participants in the review. Your system administrator will have already configured the templates you can pick from and probably has some guidelines as to which templates should be used under which circumstances. If there is only one configured template, this template will be applied automatically. |
| • | Deadline - a date when the review should be completed. This field only appears if a system administrator has set the default review deadline to a value other than 0. In that case, you will see the Deadline field with a default date that is calculated based on the value provided by the administrator. You can set the review deadline to any date that is on or after the current date. On the day before the deadline, participants will see a note in their action items that review is 'Due today'. This is intended to alert participants that if the review is not completed by midnight of the current day, it is overdue. |
| • | Completed on - a date when the review was completed. This field is read-only and filled out automatically. |
| • | Restrict access - allows you to limit those users who may access your review. By default, any user in the system can view and comment on any review at any time. However, there are circumstances where you may want to restrict viewing to those users specifically invited to the review, and this option enables you to do so. Please note that system administrators are able to view all reviews regardless of restricted access selections, and also have the ability to require that all reviews be restricted. In such cases, you will not be given an option to restrict access. |
| • | Project - a project the review belongs to. Projects are a high-level way to group reviews, that represent different artifacts, but still relate to some common entity: product, application, product area, change-set. For example, one project could host product requirements documents, design documents, source code files, test cases and marketing materials. You can filter all projects by their names and select only those, where you are a participant. |
| • | Restrict uploads/deletions - allows you to limit who can upload files into the review and delete files from the review. If this setting is enabled, only the creator and the administrators will be allowed to upload or delete files. |
| • | Overview - a detailed description of the review. This field is optional and does not have to be filled out if you would like to leave it empty. |
| • | <Custom Fields> - any other review custom fields that are enabled for current template. |
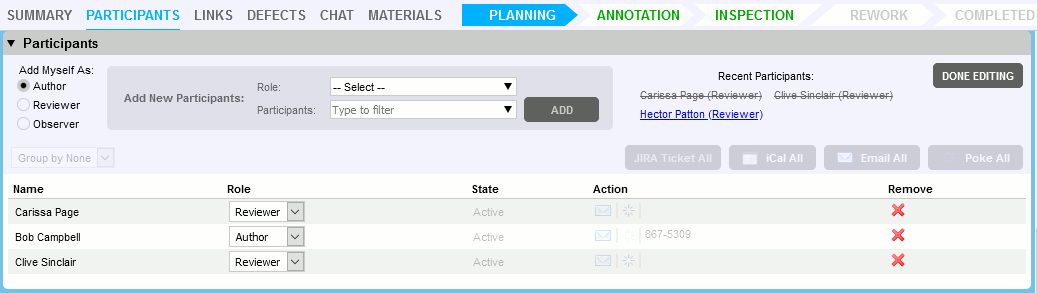
The next step in creating a review is to invite people to the review, and give each of them a role to play. In the Participants section you need to select your role on this review and add other participants.
The commonly-used roles are as follows:
| • | Author: Responsible for the files under review and probably responsible for fixing any defects that are found. |
| • | Reviewer: Responsible for finding defects; is allowed to mark defects "fixed". The review is not finished until all reviewers approve it. |
| • | Observer: Invited to the review but if all other participants are finished the review is complete. Useful when some users are not available just now and you do not want to wait for them to show up. |
| • | Moderator: Controls the pace and flow of the review; coordinates other people and decides when the review changes phases. |
Note, that the number of roles, their names and abilities are configured by your administrator. Therefore the list of user roles on your server may be different from the list above.
To add yourself as a participant in the review, select a role in the Add Myself As area.
To add another user as a participant, select the desired role in the Role drop-down menu, then select one or more users in the Participants drop-down menu, and click Add. (The Participants drop-down menu displays only the first 1000 users.)

Participants drop-down menu
Tips: |
To filter the user list, start typing the name of the desired user. The list will display only those users that contain all typed characters. To filter multiple users or group you can also search by either username, email_id ,login or groupname simultaneously with comma separated list.  Participants multiple search drop-down menu To select multiple users, just click each desired user in the Participants drop-down list. To select a range of users, click on the first user, hold down the Shift key and then click the last user. To select all users (respecting current filter, if any), click Select All button. To clear previous selection, click Clear All button. |
The Filter by drop-down is used to choose a group whose members are then listed in the Participants drop-down menu. If there are no groups associated with the review, the Filter by drop-down is not displayed. This field displays only the first 1000 groups and it excludes groups which have no members.
User/role combinations you have used recently will also appear under Recent Participants. This makes it easy and fast to select common combinations.
To change a participant's role, select a new role from the drop-down menu in the Role column.
To remove a participant, click the Remove from Review button.
Review materials is what you are asking to review. Various types of materials can be uploaded into the review. This includes but is not limited to:
| • | Files controlled by a version control system: changes committed to a remote server (pushed commits), changes that are not yet committed to a server (un-pushed commits), local changes, differences between files, changelists, branches and so forth. |
| • | Arbitrary files from your computer: text files, word processing documents, spreadsheets, presentations, PDF documents, Visio graphics, images and so on. |
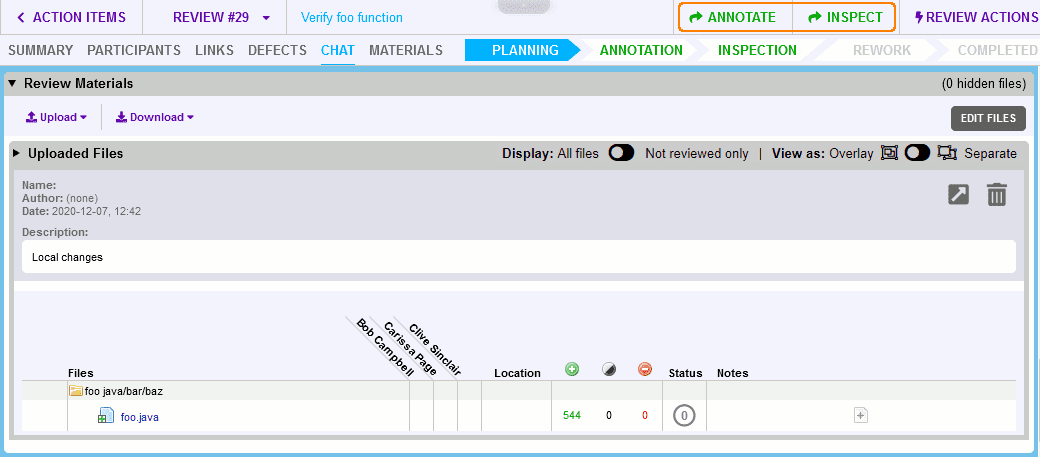
Once you have attached anything to a review, it will be listed in the Review Materials section.
Attaching review materials via desktop clients
The most common way to get files attached to a review is to use one of desktop clients: Command-Line Client, GUI Client, Eclipse Plug-in, Visual Studio Extension or Plug-ins for Perforce Visual Client. All of these clients can integrate with version control system and/or easily upload local files or file-differences to the Collaborator server.
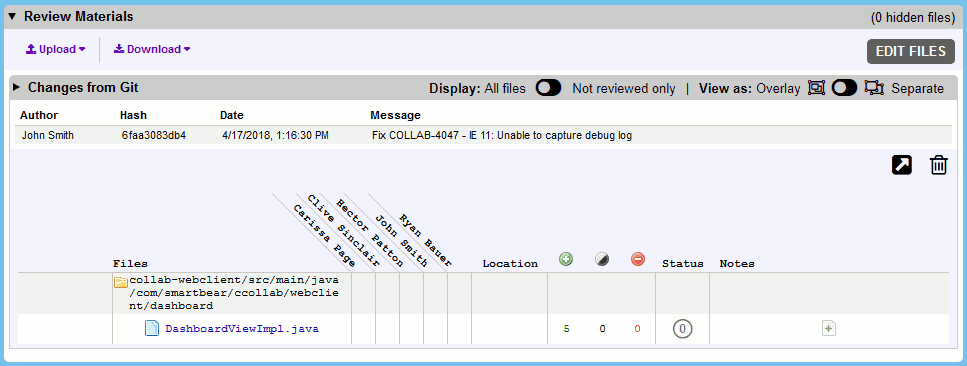
Local changes from files controlled by Git have been uploaded into this review via client.
Attaching review materials via Web Client
It is also possible to upload content directly from the Web Client. The advantage of performing this action from a web browser is that you do not need to install and configure the client.
From the Web Client you can upload the following types of content:
| • | Changes committed to a pre-configured version control system |
| • | Arbitrary files from your computer |
Attaching changelists via Web Client
In order to perform these steps, your Collaborator server must be connected to a version control system as described in Collaborator Administration - Version Control.
| • | Click the Upload button. |
| • | Select the name of the connected version control system from the drop-down list: |

| • | In the ensuing dialog, enter the unique IDs of the desired changelists and then click Attach. |
You can attach any number of changelists to a single review. Also, you can attach changelists from different version control servers to a single review.
If there is an error retrieving that version or communicating with the server, you will see an error message.
You can attach live links to web sites. Attaching a live URL will display the live contents of the link during the review (rather than a local copy of the content). This feature is useful for accessing a document on a Wiki or document management system, particularly if you link to a specific version of that document.
To add a web link:
| • | Click the Upload button. |
| • | Select URL from the drop-down list. |
| • | In the ensuing dialog, enter the desired URL and then click Attach.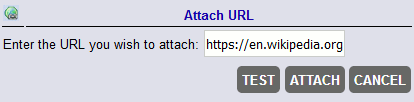 |
Notes:
| • | The URL must be a valid web URL, which should include the protocol specification (either http:// or https://). |
| • | You will also see an error message if the specified URL is malformed. |
| • | Collaborator does not check whether the specified resource is available. In fact, since it is a link, the contents and availability of the document can change at any time. |
| • | Collaborator displays the referred resource in a frame. The server can send requested contents with anti-framing headers. You will not see the referred content in this case. Depending on the web browser you use, you will see an empty frame or an error message saying that the content cannot be displayed in a frame: |

You can also attach any arbitrary file (images, PDFs, and binary file types) from your local hard drive:
| • | Click the Upload button. |
| • | Select Files from the drop-down list. |
| • | In the ensuing dialog, choose one or more files you want to attach and then click Upload. |
Tip: Alternatively, you may just drag your local files and drop them to review web page.
When the materials are uploaded, you can start the review immediately or keep it for annotating:
Click Inspect button in review header to start a review. Other participants will receive notifications about your new review, and it will be displayed in their Action Items list.
Alternatively, you can click Annotate button to apply the current changes, and proceed to optional Annotating phase. In this phase all participants that you have added will be notified about this review and will be invited to add their comments and review materials. The review will not begin until you select the Inspect button.
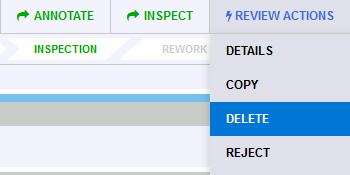
Deleting a review before it starts
To cancel a review before it begins, select Review Actions | Delete in review header: