The Project Screen is displayed when you are creating or editing projects in Collaborator. Projects are a high-level way to group reviews, that represent different artifacts, but still relate to some common entity: product, application, product area, change-set. For example, one project could host product requirements documents, design documents, source code files, test cases and marketing materials.
Any user can create new projects. To modify an existing project you should be its participant.
This page includes a fixed header-toolbar and a number of sections:
| • | Chat |

The header of Project Screen has fixed position and is always displayed whenever you scroll the screen up or down. It contains the following items:
Returns back to Projects panel. |
|
Displays the title of current project. |
|
Open, In Progress, Complete |
Moves the project to another status. The actual number of available actions depends on the current status of the project. |
Displays a list of various actions available for the current project. The actions are: |
|
Copy - Creates a new project on the basis of current project. Copies project title, description and list of participants from the current project. |
|
Delete - Deletes a project. Deleted project cannot be reactivated even by administrator. |
|
Summary, Participants, Chat, Reviews |
Navigates to the respective section of the Project Screen. Currently displayed section is underlined. Each section will be described below. |
The General Information section provides basic information about the project: current status, number of participants, number of reviews and so on.

This section includes the following fields:
| • | Project title - a brief description for the project. The title is used all over the place -- in Action Items, in notification emails, to web page titles, and so forth. Titles do not have to be unique in the system; projects already have a unique ID that is assigned by the server. |
| • | Created - a date when the project was created and a user who created it. This field is read-only and filled out automatically. |
| • | Description - an optional description for the project. |
Unless you are creating a new project, most of section fields are in read-only mode. To modify field values, click Edit, make your corrections and then click Done editing to submit your changes.
The Participants section lists users who can access the current project and allows to add or remove participants.
Unless the project is in the Planning status, the Participants section will be in read-only mode. To add or remove participants or change their roles, click the Edit button. The Participants section will look like this:

To add participants, select one or more users in the Participants drop-down menu, and click Add. (The Participants drop-down menu displays only the first 1000 users.)
Tips: |
To filter the user list, start typing the name of the desired user. The list will display only those users that contain all typed characters. To select multiple users, just click each desired user in the Participants drop-down list. To select a range of users, click on the first user, hold down the Shift key and then click the last user. To select all users (respecting current filter, if any), click Select All button. To clear previous selection, click Clear All button. |
To remove a participant, click the Remove from project button.
Once you are finished editing the participants, click Done Editing.
The Chat section allows exchange of messages with other project participants. It logs events of acceptance as well.
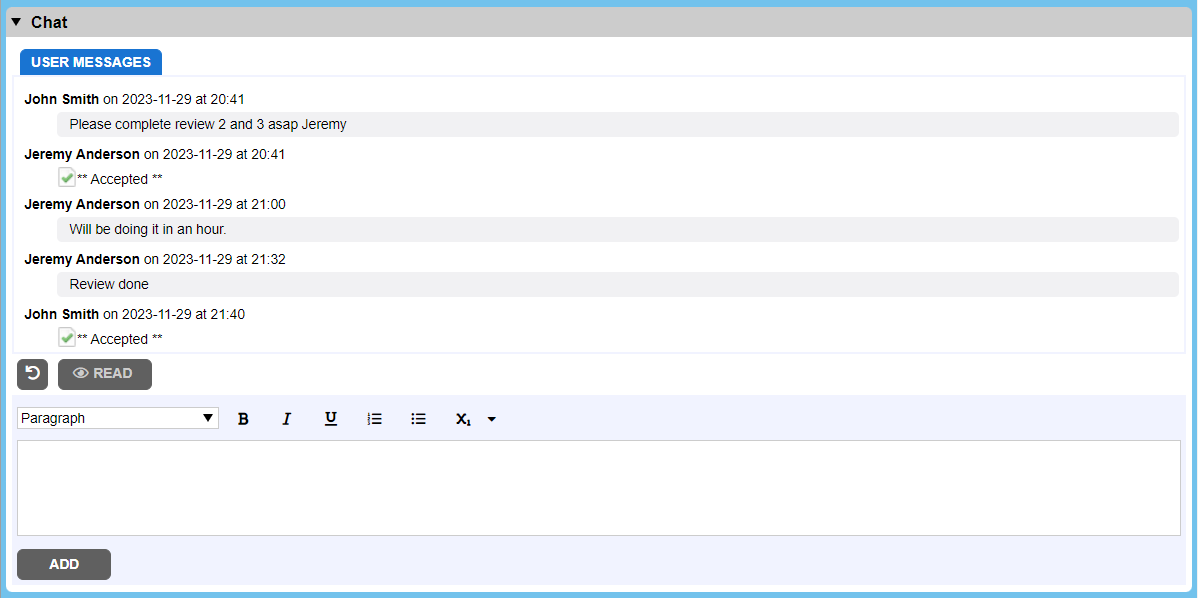
Start Conversation
To start a conversation, type your comment in editor window and click on Add button. Comment could be in plain-text or use rich-text and markdown formatting.

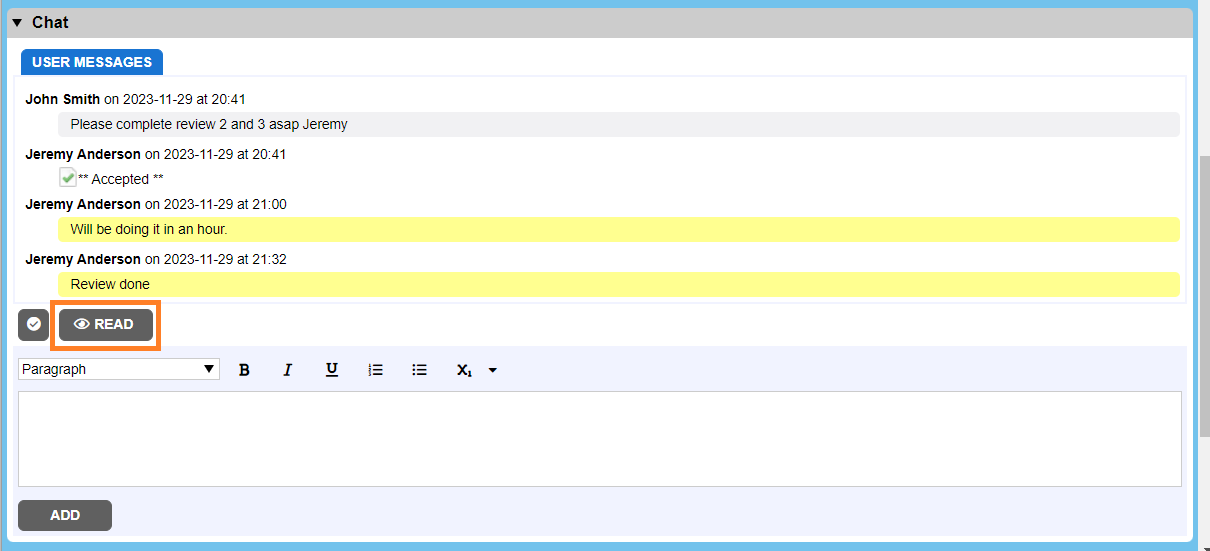
To other project participants message appears in yellow, it helps make the conversation stand out as needing to be read. To clear the "unread chat" state without answering, click the Read button.
Accept Comments
In addition to marking a conversation as read, you can also click the Mark Accepted button in the chat to accept the comment.
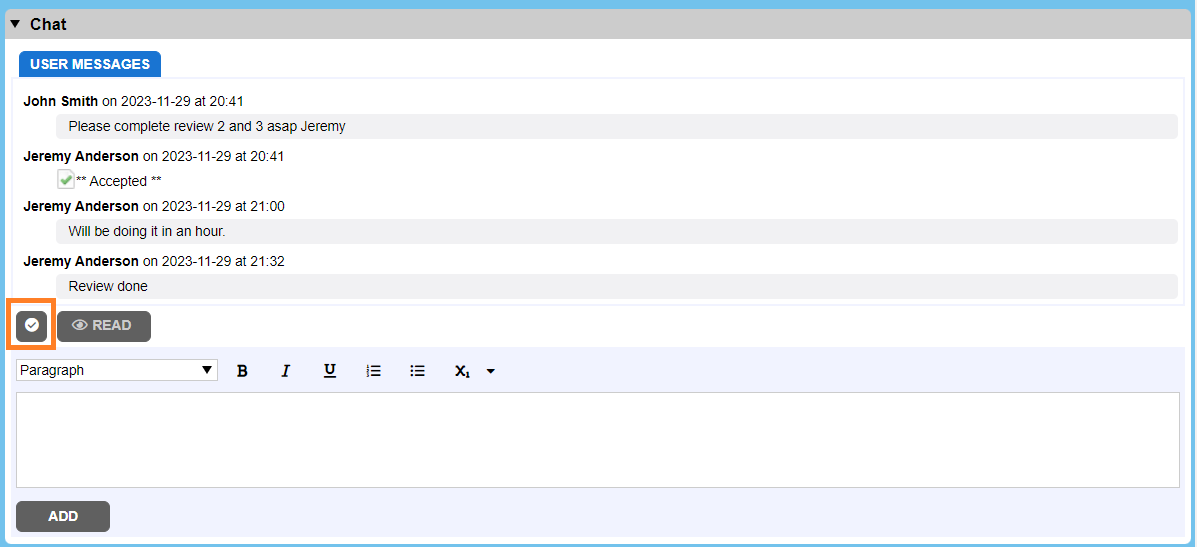
When the conversation is already accepted the Mark Accepted button is changed and user can un-accept conversation if it’s needed (e.g., it was accepted by mistake).
Edit Comments
Project participants can modify their own comments.
To edit a comment:
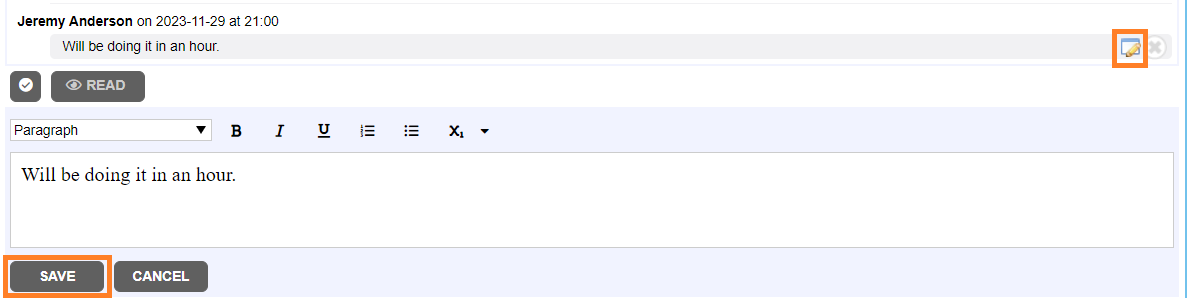
| • | Mouse-over the specific comment you would like to modify and click Edit. |
| • | Modify comment text and click Save. |
Delete Comments
People can discard their comments .
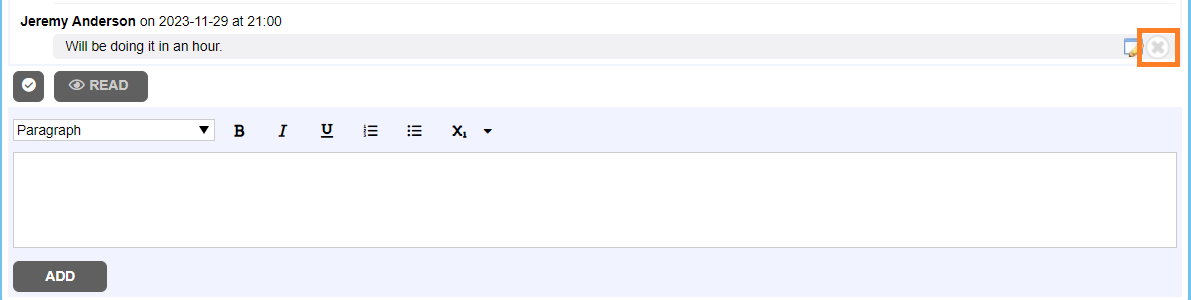
To discard a comment:
| • | Mouse-over the specific comment you would like to discard and click Delete. |
Notes:
People can only delete and edit their own comments unless it is followed by another participant's comment or acceptance.
This section lists all reviews that belong to the current project and allows to add or remove reviews.
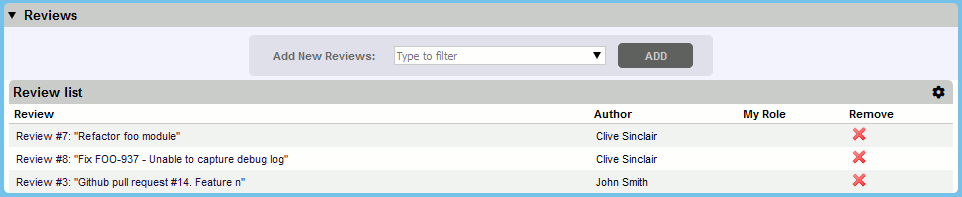
To add reviews to the project, select one or more reviews in the Add New Reviews drop-down menu, and click Add.
Tips: |
To filter the review list, start typing the name of the desired review. The list will display only those reviews that contain all typed characters. To select multiple reviews, just click each desired review in the Add New Reviews drop-down list. To select a range of review, click on the first review, hold down the Shift key and then click the last review. To select all reviews (respecting current filter, if any), click Select All button. To clear previous selection, click Clear All button. |
To remove a review from the project, click the Remove from project button.
Alternatively, you can add review to the project or remove it from the project using the Project drop-down in the General Information section of the Review Screen.
The Review list table displays all reviews that belong to the current project. Clicking on the review title in the list will open the selected review in the Review Screen.
You can configure what information will be displayed in the Review list table. You can add or hide standard review fields as well as custom review fields. To do this, hover the ![]() button and select the desired review fields in the drop-down list.
button and select the desired review fields in the drop-down list.
Additionally, you can sort action items by clicking on the column headers: "Review", "Author", "My Role" and so on.